Minecraft Sphere Generator
Design flawless 3D pixel spheres with high-precision layer-by-layer blueprints.
A Minecraft Sphere Generator is a free online tool that calculates exact block placement for building perfect spheres in Minecraft. Instead of manual guessing, it gives you a layer-by-layer blueprint so every sphere.
From a small 9-block globe to a 256-block mega build, comes out symmetrical and accurate.
You start by setting your sphere’s diameter, then choose whether you want a hollow shell or a solid ball. The tool instantly shows a grid for each Z-height layer along with the total block count you’ll need. Follow the layers one by one in-game, bottom to top, and your sphere matches the blueprint exactly.
It works on any Minecraft edition since it just shows you where to place blocks, no mods or downloads required.

About This Minecraft Sphere Generator
|
Minecraft Sphere Generator |
|
|
100% Free Online Tool |
|
|
2 hours Ago |
|
|
mycraftcirclegen.com |
|
|
Free of Cost |
|
|
Web, Mobile, Desktop, Tablet |
|
|
Java + Bedrock |
|
|
3D Sphere Generator with Layer-by-Layer Blueprint, Hollow Mode & Material Calculator |
|
|
⭐ 4.7/5 |
What is Minecraft Sphere Generator?
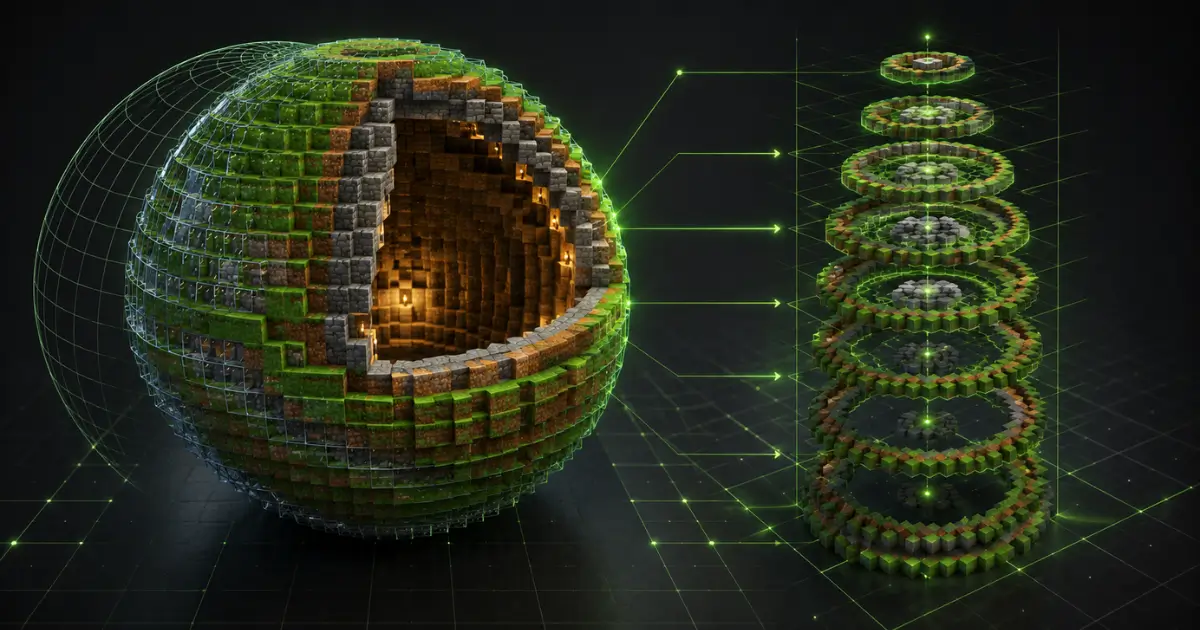
Minecraft is a block-based world. Every structure you build is made of cubes.
That makes building round shapes surprisingly tricky.
A Minecraft sphere generator solves this. It takes your desired size and outputs an exact blueprint of
which blocks to place at every level. No math. No trial and error. Just follow the guide and build.
Here is the thing most beginners do not realize: a sphere in Minecraft is never truly round.
It is a voxel approximation, meaning the game uses a grid of cubes to mimic the look of a sphere
as closely as possible. The generator handles all that calculation so you do not have to.
How to Use Mincecraft Sphere Generator?
Step by Step Guide
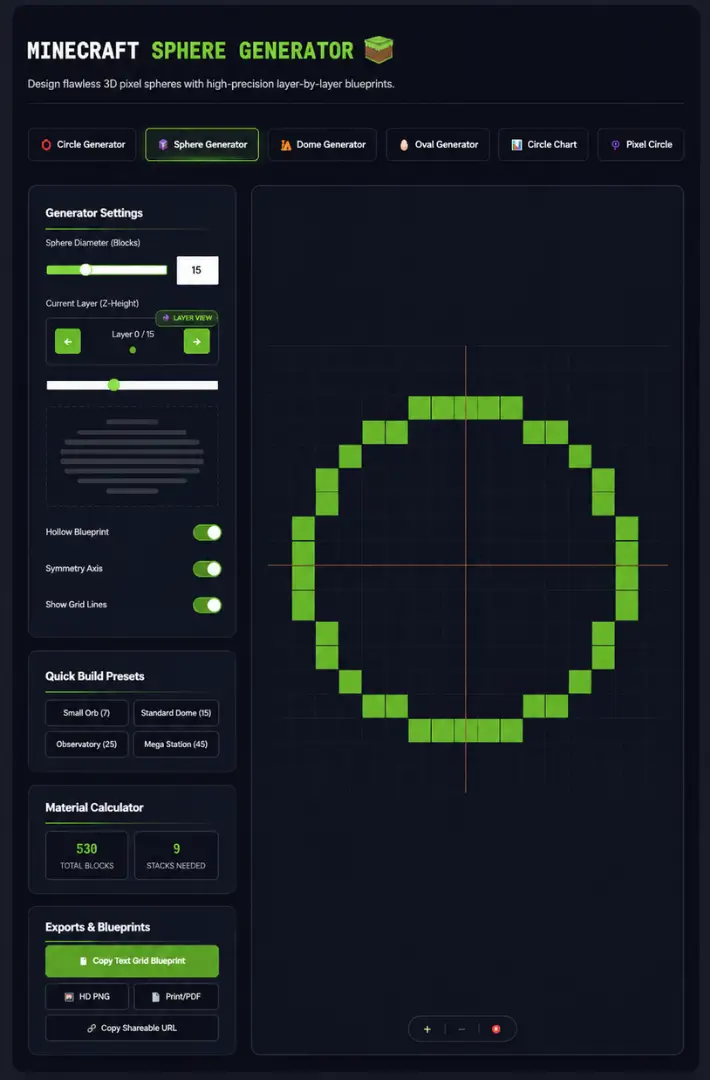
To use the Minecraft Sphere Generator, set your sphere diameter with the slider, move through each Z-height layer to see the blueprint, turn on Hollow Blueprint for a lighter build, then check the Material Calculator and export your final design as text, PNG, or PDF.
Here’s the full breakdown of every step.
Step 1: Set Your Sphere Diameter:
Start with the Sphere Diameter (Blocks) slider at the top of the tool. Drag it, or type a number directly into the box next to it.
For example, set the diameter to 15 and the tool instantly generates a blueprint needing 538 total blocks, which comes out to 9 stacks in your inventory.
Most builders start small, around 10 to 20 blocks, to test the shape before scaling up to bigger sizes like 25 or 45.
Step 2: Move Through Layers Using the Z-Height Controls
A sphere is built one horizontal slice at a time. The Current Layer (Z-Height) panel lets you scroll through each slice using the left and right arrow buttons.
The Layer View label tells you exactly which Z-level you’re looking at right now. The slider underneath lets you jump between layers quickly, which is handy on bigger spheres where you might have 20 or more layers to go through.
This is really the core of the whole tool. Build each layer in-game exactly as shown on screen, then click the right arrow and move to the next one.
Step 3: Turn On Hollow Blueprint
The Hollow Blueprint toggle switches your sphere from a solid filled ball to a hollow shell.
Hollow is almost always the smarter pick. It cuts your block count down a lot and gives you usable space inside, which is exactly what you want for domes, bases, or any sphere players will walk into
Step 4: Use Symmetry Axis and Grid Lines
Two more toggles help keep your build accurate:
- Symmetry Axis: mirrors one half of the sphere automatically, so both sides stay perfectly even
- Show Grid Lines: adds reference lines across the layer view, making it much easier to count block positions while you place them in-game
Leave both of these switched on. They make a real difference once you’re staring at the layer view trying to figure out where block number 12 in row 4 actually goes.
Step 5: Try Quick Build Presets
Not sure what size to go with? The Quick Build Presets panel gives you four ready-made options:
- Small Orb (7): tiny decorative spheres
- Standard Dome (15): the go-to size for survival bases
- Observatory (25): bigger structures and server builds
- Mega Station (45): large-scale creative projects
One click loads the entire blueprint for that size instantly. No manual diameter setting needed.
Step 6: Check the Material Calculator
Before placing a single block, glance at the Material Calculator panel. It shows your Total Blocks count and the Stacks Needed, based on a standard stack of 64.
At diameter 15, that’s 538 blocks, or 9 stacks. Grab your materials ahead of time so you’re not running back to your storage room halfway through.
Step 7: Export Your Blueprint
Once you’re happy with the size and shape, head to the Exports & Blueprints panel:
- Copy Text Grid Blueprint: copies a text version of every layer, perfect for sharing in Discord
- HD PNG: downloads a high-resolution image of your full blueprint
- Print PDF: generates a printable version for offline building
- Copy Shareable URL: saves your exact settings in a link, so friends can open the same sphere setup instantly
Sphere vs Circle: What’s the Difference in Minecraft?


Minecraft Sphere Generator with WorldEdit Commands
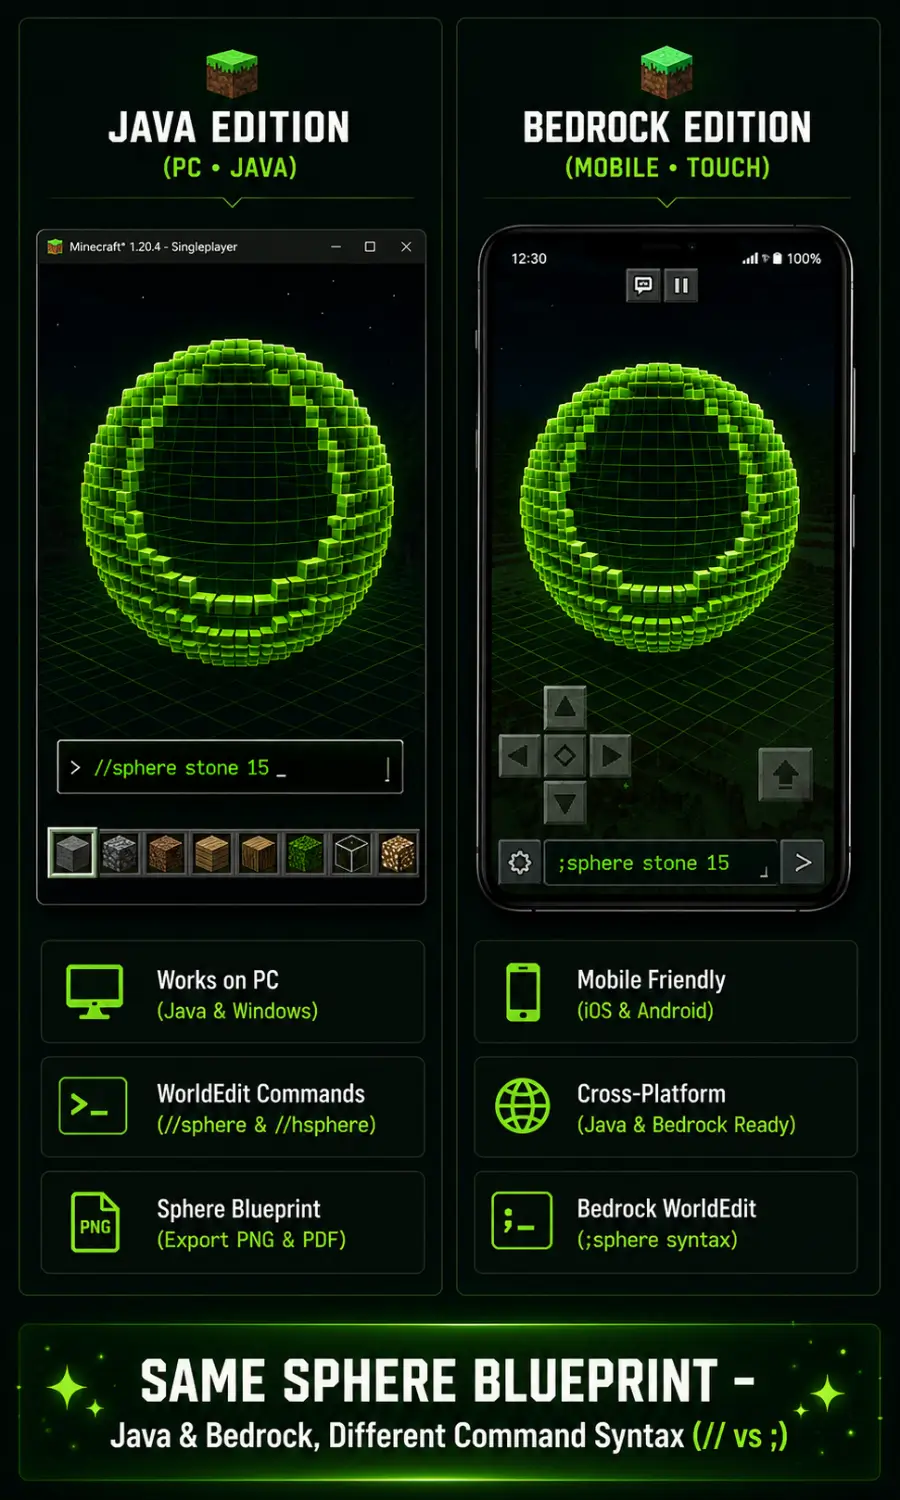
If you play on a Java Edition server with WorldEdit installed, you can build spheres directly in-game without placing a single block manually. WorldEdit is developed by EngineHub and is one of the most widely used Minecraft plugins in the modding community.
How to Make a Sphere in Minecraft Using WorldEdit
Basic command format:
//sphere <block> <radius>
Example: //sphere stone 15 builds a solid stone sphere with a 15-block radius. That is 30 blocks wide total.
Important: WorldEdit uses radius, not diameter. This trips up almost every beginner. If you want a 20-block wide sphere, use radius 10.
How to Make a Hollow Sphere with WorldEdit
Two options work here:
Or the flag method:
//sphere -h <block> <radius>
Example: //hsphere glass 20 creates a hollow glass sphere 40 blocks wide. The -r flag raises the sphere from your feet upward, which is useful for building from the ground.
WorldEdit Dome Command
To create a dome (top half only) using WorldEdit, add the -d direction flag:
Example: //sphere -d up stone 10 generates a top-half stone dome with a 10-block radius.
Java Edition vs. Bedrock Edition
Pros of Java Edition
Cons of Bedrock Edition
Minecraft Sphere Generator: Creative Build Ideas

Once you understand how the tool works, the build possibilities open up fast.
Survival Mode Base with a Rounded Roof
A hollow sphere out of obsidian or deepslate makes one of the most secure survival bases in the game. Curved walls are harder for mobs to navigate, and a rounded roof seals the structure completely.
Floating Sky Orb Decoration
Large hollow spheres made of glass or glowstone look stunning floating above a server spawn area. Use barrier blocks or slime blocks underneath for invisible support.
Globe and Planet Earth Build
Full spheres with layered coloring are popular in creative mode servers. Blue blocks for ocean layers, green for land masses, white for polar caps. A pixel sphere generator style approach works perfectly for this kind of artistic build.
Redstone Farm with Circular Layout
Rounded structures make excellent mob farm enclosures. The curved ceiling creates natural fall zones for hostile mobs. Several Minecraft technical players on servers like Hypixel use rounded designs for XP farms.
Server Monument and Spawn Hub
A large sphere saved as a shareable blueprint can be sent to your whole team and rebuilt the exact same way by different players. This is particularly useful for server owners who want a consistent, branded spawn area no matter who’s building it.

Explore More Minceraft More Shape Generators
Minecraft Sphere Sizes:
Block Count Reference Chart
|
|
|
|
|
|
|
~524 |
Small Decoration |
|
|
~520 |
~4,189 |
Roop or Dome cap |
|
|
|
~14,137 |
survival based |
|
|
|
~65, 450 |
server monument |
|
|
|
~523,598 |
mega build |
These numbers are approximate. Actual counts vary slightly between tools due to different rounding algorithms. Always check your generator’s block count display before gathering materials.
Common Mistakes When Building a Minecraft Sphere
Most sphere builds in Minecraft go wrong for the same handful of reasons. Here’s what to watch out for before you place a single block.
Mistake 1: Mixing Up Diameter and Radius
This is the number one mix-up, especially once players move from an online generator to WorldEdit commands. A generator usually asks for diameter (the full width). WorldEdit’s //sphere command asks for radius (center to edge).
If your blueprint says diameter 20 but you type //sphere stone 20 in WorldEdit, you’ll end up with a sphere 40 blocks wide instead of 20. Always check which measurement your tool or command is asking for.
Mistake 2: Losing Track of the Current Layer
Spheres are built layer by layer, and on bigger builds that can mean 20, 30, even 45 layers. It’s incredibly easy to lose count partway through and place an entire layer in the wrong spot.
Use the Z-height layer controls in your generator and move through layers one at a time, checking your in-game build against the screen before moving on.
Mistake 3: Choosing Solid When Hollow Would Work Better
A solid sphere fills every block inside the shape, not just the surface. For most builds, this is wasted material. A hollow sphere at diameter 20 needs around 520 blocks, while the solid version needs roughly 4,189.
Unless you specifically need a solid mass, like a decorative planet model, switch to hollow. It saves materials and gives you room to build inside.
Mistake 4: Skipping the Material Calculator
Nothing kills momentum faster than running out of blocks halfway up a sphere and having to stop, mine more, and come back. Before you start, check the total block count and how many stacks you’ll need, then gather everything in one trip.
Mistake 5: Not Marking the Center Point First
A large sphere saved as a shareable blueprint can be sent to your whole team and rebuilt the exact same way by different players. This is particularly useful for server owners who want a consistent, branded spawn area no matter who’s building it.
Mistake 6: Going Oversized Without Thinking About Lag
A 100-block diameter sphere sounds impressive, but on a multiplayer server it can cause real performance issues, especially with solid blocks. Before going mega-sized, check your server’s render distance and consider a hollow build with lighter blocks to keep things smooth for everyone.
Frequently Asked Questions (FAQs)
Conclusion:
Building a perfect sphere in Minecraft used to take hours of frustrating trial and error. With the right Minecraft sphere generator, it takes minutes. Set your diameter, choose hollow or solid, follow the layer-by-layer blueprint, and your build comes out symmetrical every single time.
Whether you’re building a floating sky orb, a massive globe, or a half-sphere roof using a Minecraft half sphere generator, the process is the same. Use the free tool, read the layers, build from the bottom up.
Try the Minecraft Sphere Generator above, start with a size 15 or 25 hollow sphere, and see how much cleaner your builds become.