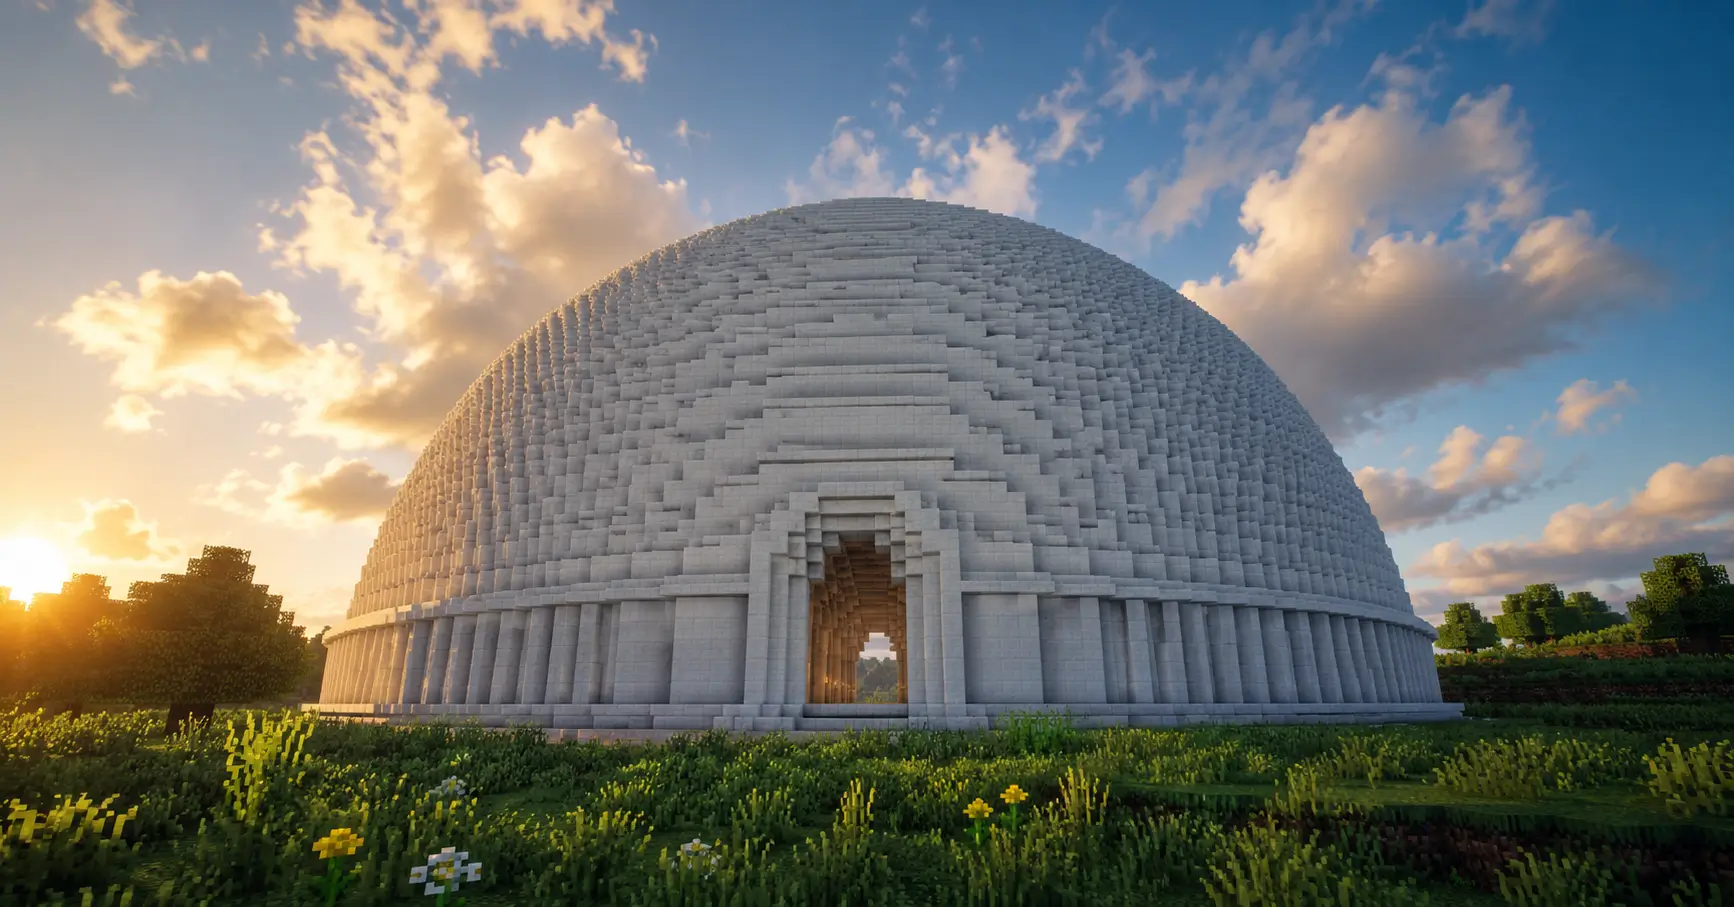
How to Build a Dome in Minecraft (Any Size, Step by Step)
Building a dome in Minecraft is one of those things that looks complicated but actually follows a simple logic. You stack circular rings of blocks, making each ring slightly smaller than the one below, until they meet at the top. Whether you want a glass dome, a stone dome, or an underwater base, this guide walks you through every method.
From small beginner builds to large cathedral-scale structures. Players across the USA, UK, Canada, and Australia use dome builds for everything from survival homes to massive ocean floor bases.
What Is a Dome in Minecraft?
A dome is a half-sphere structure built by stacking decreasing circular layers from a wide base up to a single point at the top. When you look at it from outside, those stacked rings create a smooth curved surface that mimics a real-world architectural dome.
Here’s how to build a dome in minecraft: Minecraft does not have curved blocks. Everything is a square. So when you build a dome, you are actually approximating a curve using clever block placement. The wider your dome, the smoother that curve looks.
One real-world example of this: a 40-block diameter quartz dome built over a nether portal hub became one of the most upvoted builds on r/MinecraftBuilds, with players noting how much smoother it looked compared to hand-estimated attempts. The difference was using a dome generator for every single layer.
How Domes Work in a Block-Based Game
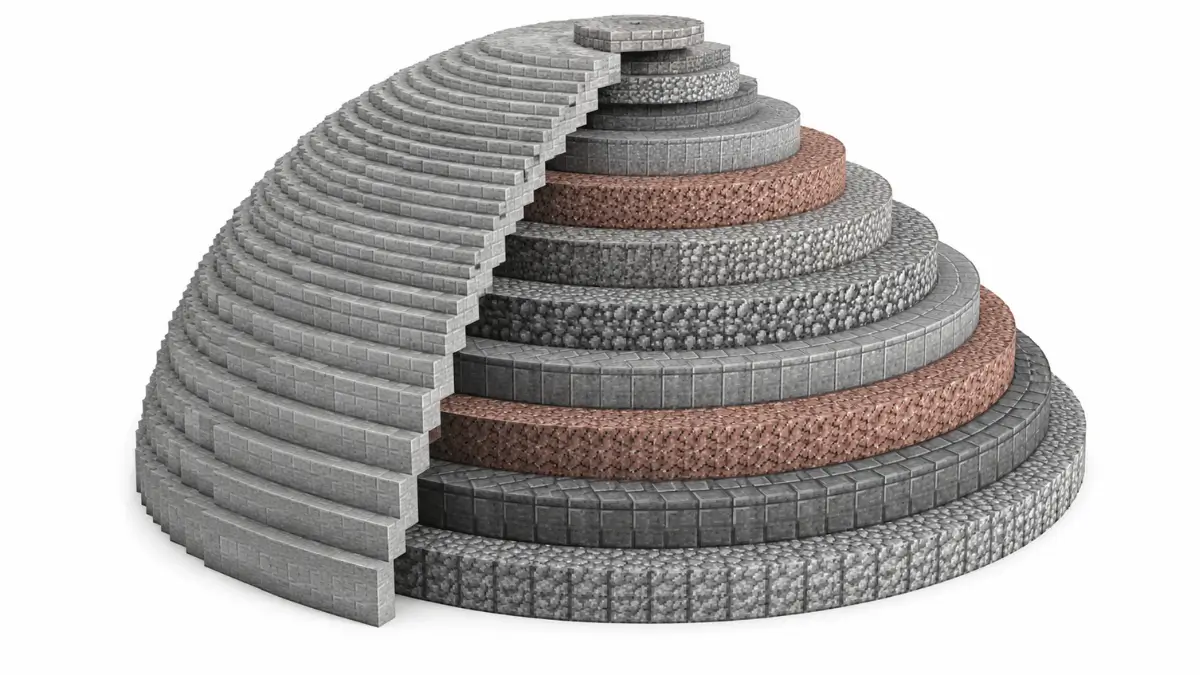
Circles in Minecraft are never perfect. They are pixel-art approximations made from straight block lines that step in and out to suggest a curve. A dome takes this same idea into 3D.
Think of it like stacking dinner plates. The bottom plate is the widest. Each plate above it is slightly smaller. Stack enough of them and you get a dome shape. Each horizontal layer is one of those plates.
This is why a dome generator matters so much. It calculates the exact diameter of every layer for you, so your dome looks smooth instead of lumpy.
Common Uses for Domes in Minecraft
Domes are more useful than most players realize. Here are the main builds where they shine:
- Dome houses: a rounded shelter that looks far more impressive than a box
- Greenhouse domes: glass builds for farms or decoration
- Underwater dome bases: one of the most popular survival builds in the game
- Stadium or arena roofs: large domes over spectator areas
- Observatory or tower caps: a dome sitting on top of a tall stone tower
What You Need Before Building
Planning saves a lot of frustration. Before placing a single block, figure out your size and materials first.
Choosing the Right Dome Size
Diameter is everything. It determines how many blocks you need, how smooth the dome looks, and how long the build takes.
Here is a rough size guide:
- 10 to 15 blocks: Small domes for well covers, gazebos, or single rooms. Fast to build but the curve will look noticeably blocky.
- 20 to 30 blocks: Medium domes for houses and tower rooftops. A good balance of smoothness and build time.
- 40 to 60+ blocks: Large domes for cathedrals, stadiums, and massive bases. These look stunning but require significant material planning.
One Important Note: block count grows exponentially as diameter increases. A 10-block dome outline needs roughly 50 to 80 blocks. A filled 40-block dome can push into the thousands. Always check your block count before you start gathering.
Best Materials for a Minecraft Dome
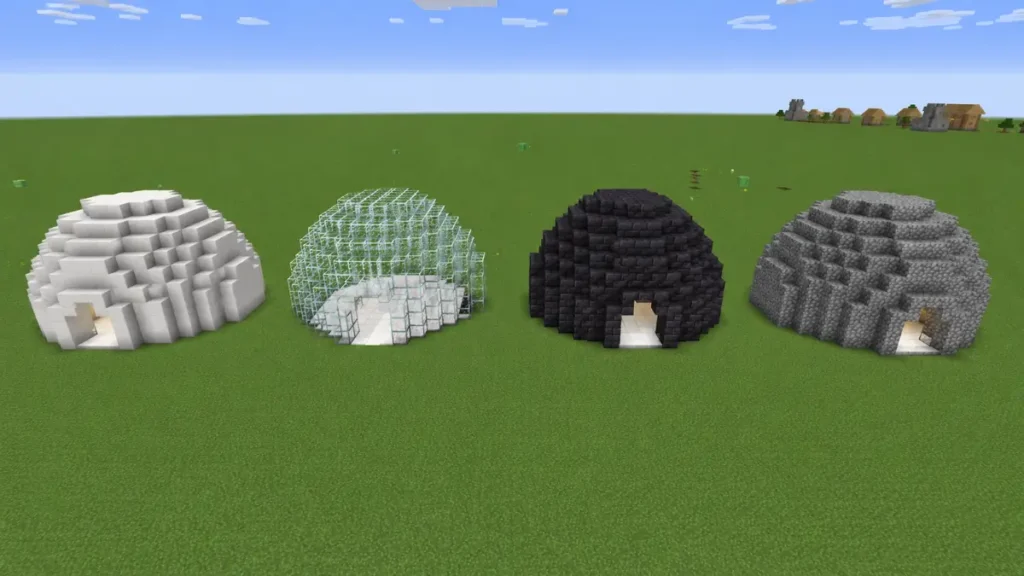
The material you pick changes the whole personality of your build.
- Glass blocks: transparent, elegant, perfect for greenhouses and underwater domes
- Stained glass: add color gradients for a stunning visual effect
- Stone or cobblestone: durable, great for survival early game
- Quartz blocks: smooth, premium look for fantasy or modern builds
- Blackstone or Netherrack: dark, moody dome styles
- Slabs and stairs: not for full layers, but useful for smoothing edges between rings
How to Use a Dome Generator
This is genuinely the easiest way to build a dome in Minecraft. A Minecraft dome generator calculates every layer’s ring pattern for you. No math, no guessing.
The Minecraft Dome Generator on Mine Craftcircle Generator is built specifically for this. It shows you layer-by-layer blueprints for domes of any size, with a block count included.
Step-by-Step: Using a Minecraft Dome Generator
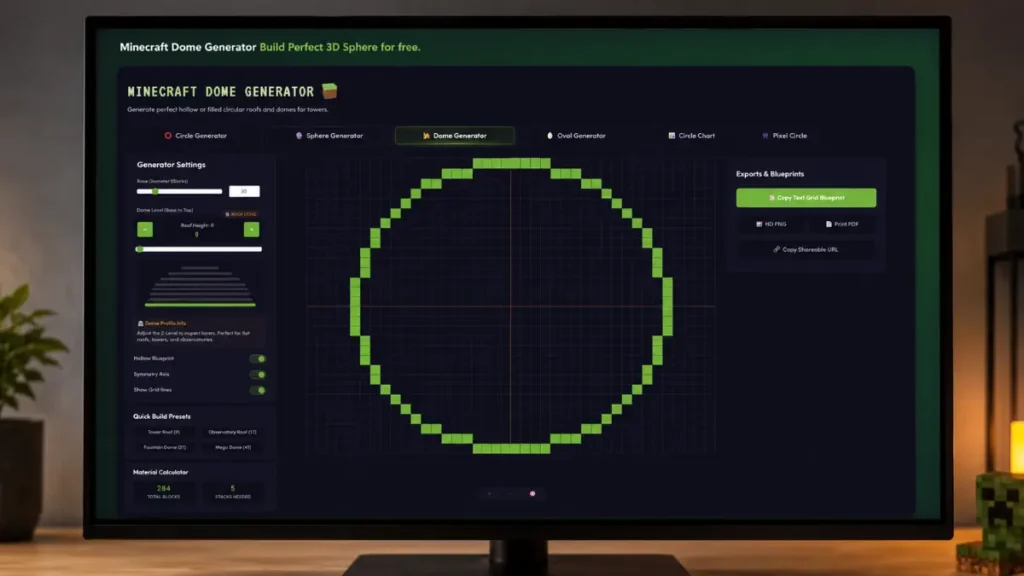
Follow these steps and your dome will come out accurate every time:
- Open the dome generator tool and enter your desired diameter using the slider.
- The tool displays each horizontal layer from Layer 0 (widest base) to the top.
- Use the layer slider to preview each ring before you build it.
- Note the total block count shown in the tool and gather your materials first.
- Start in-game at your chosen height and build Layer 0 exactly as shown.
- Move up one block, switch to Layer 1’s pattern, and repeat until the dome is closed.
Most people miss this: always build your base circle first and verify it looks right before going up. Fixing the base is easy. Fixing a mistake at Layer 15 is painful.
Reading Layer Patterns in the Generator
Each layer in the generator shows you a top-down circle blueprint. The number tells you which vertical level it represents, Layer 0 is the ground ring, Layer 1 is the next ring up, and so on.
As you move up, the radius shrinks. The generator handles those calculations automatically. Your job is just to match the pattern in-game, one layer at a time.
How to Build a Dome in Minecraft Step by Step (Manual Method)
If you want to understand the logic without relying on a tool, here is the full manual method. This works for both Java Edition and Bedrock Edition.
Step 1: Define Your Center
Before you build a single ring, mark your center point clearly.
Use a 1×1 block for small domes, a 2×2 or 4×4 for larger ones. The center must be symmetrical on all four sides. This is not optional. If your center is off by one block, your entire dome will be lopsided.
According to experienced builders in the Minecraft community, skipping the center symmetry step is the single most common reason a dome looks “off” even after following every other step correctly.
From the center, count outward in four directions to mark your radius. This gives you the outer edges of your base ring.
Step 2: Build the Base Circle
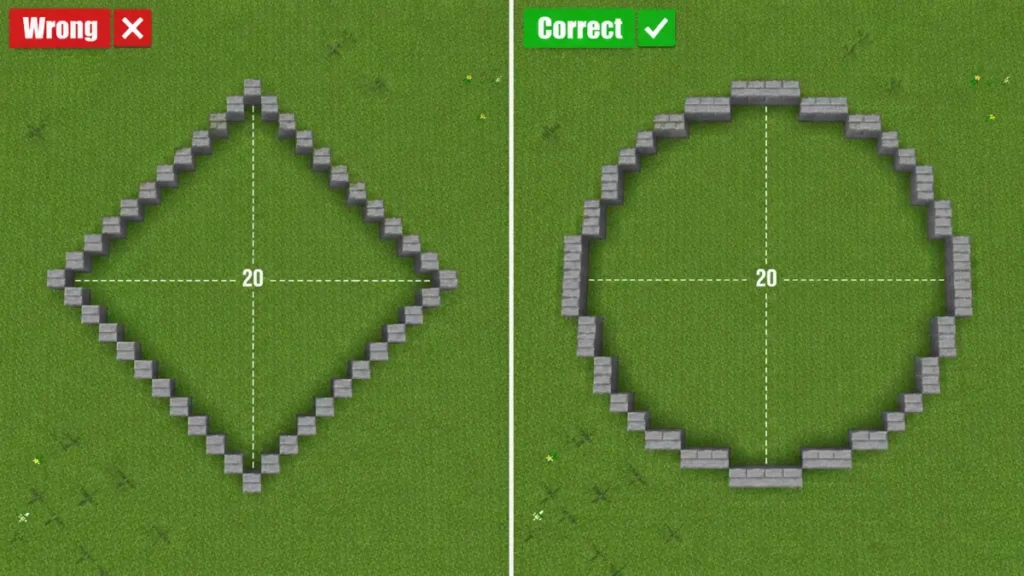
Your base circle is the most important layer. Get it wrong and every layer above it compounds the mistake.
Use the Circle Generator on minecraftcircle-generator.com to get the exact pattern for your chosen diameter. The most common mistake here is creating a diamond shape instead of a true circle. This happens when you connect the four radius lines diagonally in a straight line.
The fix: the sides of your circle should have variation, a mix of 2-block and 1-block steps depending on dome size. Never straight diagonal lines.
Step 3: Layer Upward with Decreasing Rings
Once your base is solid, the rest is repetition with smaller circles.
Each layer up uses a smaller diameter ring. The exact sizes depend on your base diameter and dome height. A dome generator gives you these values precisely. Without one, you are estimating, which works for small domes but fails badly on large ones.
Use scaffolding blocks to access higher layers on large builds. Craft them from bamboo and string, and remove them once the dome is closed.
Step 4: Smooth the Edges with Slabs and Stairs
Raw block layers can look sharp at the transitions. Slabs work better on medium to large domes because the smoothing is more subtle. Stairs suit smaller domes where the angle between layers is steeper.
At points where two sides of the dome meet, alternate your block lines: use a 2-block line, then a 1-block line, depending on the dome’s size. This kills the harsh corners and gives the curve a more natural look.
Step 5: Close the Top
The final layer is a single block or a small 2×2 cap depending on your dome’s diameter.
Once it is placed, fly above your dome and circle around it from multiple angles. Check for any layers that look awkward or out of step with the rest. Sometimes removing or adding a single block smooths out a rough spot completely.
How to Build a Glass Dome in Minecraft
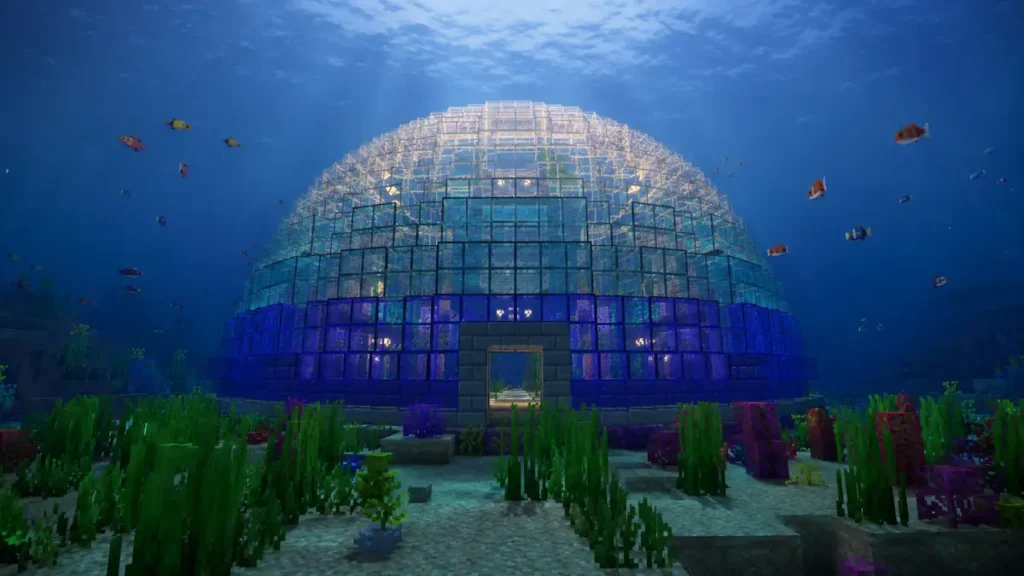
A glass dome is one of the most popular builds in the game. It looks incredible over an underwater base or as a greenhouse structure.
Glass Dome Planning Tips
Glass is unforgiving because you can see through it. Every misaligned block is visible from outside and inside. Here are the key things to get right:
- Use glass blocks, not glass panes. Panes are thinner and create a different visual profile. Mixing both in one dome looks wrong.
- For a professional look, use a stained glass gradient: darker tones at the base transitioning to lighter or clear glass near the top.
- Plan your lighting before you seal the dome. Once it is closed, adding internal light sources becomes tedious.
Lighting a Glass Dome from Inside
Mobs can spawn in unlit areas, even inside a beautiful glass dome. Fix this before it becomes a problem.
Glowstone placed inside the floor or lower walls is the cleanest solution. For an underwater glass dome, sea lanterns fit the aesthetic perfectly. Avoid regular torches inside a glass structure. If a nearby block gets updated, the torch can pop off and drop as an item.
How to Build a Dome in Minecraft Survival Mode
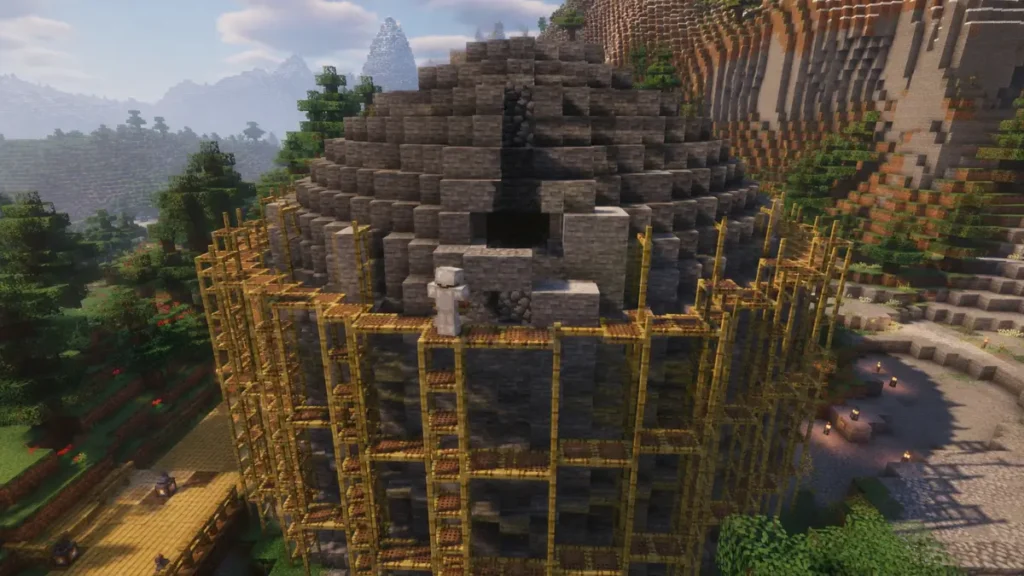
Survival adds a real constraint: you have to gather every block yourself. The method is identical to Creative Mode, but the preparation phase matters more.
Gathering Materials in Survival
For a glass dome, collect sand from beaches or deserts and smelt it in a furnace. This takes time for large builds, so set up multiple furnaces running simultaneously.
For quartz domes, mine in the Nether. Nether Quartz spawns abundantly throughout the Nether, but prepare properly before heading in.
Cobblestone and stone are the easiest materials for early-game survival domes. They are everywhere and require no special preparation.
Using Scaffolding in Survival
Scaffolding is the cleanest way to build tall domes in survival. Craft it from bamboo and string bamboo grows quickly in jungle biomes and can be farmed.
Place scaffolding from the ground up as you build each layer. When the dome is complete, break the bottom scaffolding block and the entire tower collapses in one chain. Much faster than clearing dirt platforms block by block.
How to Build a Dome in Minecraft Java vs Bedrock
Good news: the actual dome-building method is identical in both editions. The technique does not change.
Differences in Building Between Java and Bedrock
The differences are in the tools available to you, not the blocks themselves.
- Java Edition: The F3 debug screen shows your exact X, Y, Z coordinates. This makes it easy to verify symmetry and layer heights as you build.
- Bedrock Edition: No F3 by default, but coordinates can be toggled on in world settings. Touch/controller input can make precise placement slightly trickier on smaller domes.
- Both editions work fully with online dome generator tools. The block patterns are the same regardless of which version you play.
Minecraft Dome Ideas and Designs

Once you understand the technique, the builds you can create are genuinely impressive.
- Dome House: A medium 20-block diameter dome in quartz or smooth stone makes a striking survival home. Add a flat entrance platform and windows at the lower layers.
- Underwater Dome Base: Build a glass dome on the ocean floor, seal it, then scoop out the water using sponge blocks. Sea lanterns around the inner walls complete the look.
- Dome Greenhouse: A glass dome over a farm plot looks incredible and functions well. Use a 15 to 20 block diameter for a practical size.
- Cathedral Dome: A 50+ block dome over a large interior hall. Reference the Dome Generator for every single layer on a build this size.
- Oval Dome Variation: Want a flattened or elongated dome? The Minecraft Oval Generator gives you ellipse-based layer patterns for non-circular dome shapes.
If you want to build a fully enclosed ball structure rather than a half-dome, the Minecraft Sphere Generator provides complete sphere layer patterns using the same layer-by-layer approach.
Common Mistakes When Building Domes in Minecraft
Most failed domes come from the same handful of mistakes. Here is what to avoid:
- Starting without a generator on any dome above 15 blocks. Eyeballing simply does not work at that scale.
- Creating a diamond base instead of a true circle. The sides need variation, not straight diagonal lines.
- Skipping the symmetry check before going up. Verify all four sides of your base ring before building Layer 1.
- Mixing glass panes with glass blocks in the same dome. They have different visual thicknesses and look wrong together.
- Not using scaffolding on large builds. Working from outside on a 40-block dome without scaffolding is a nightmare.
Frequently Asked Questions
🏗️ How do you build a dome in Minecraft step by step?
🎮 What is the easiest way to make a dome in Minecraft?
⚒️ Can you build a dome in Minecraft without mods?
🌐 What is the difference between a dome and a sphere in Minecraft?
🧱 How many blocks do I need to build a Minecraft dome?
💻 Does the dome-building method work the same in Java and Bedrock?
Final Thoughts on Building a Dome in Minecraft
Learning how to build a dome in Minecraft comes down to one core idea: stacked circles that get smaller as they go up. Use a dome generator to get the exact ring patterns, pick your materials based on the build style you want, and work from the center outward.
Start with a small 15-block dome to get the feel for the technique. Once that clicks, scaling up to large glass domes or cathedral builds becomes straightforward. Builders in the USA, UK, Canada, and Australia consistently rank dome builds among their most shared Minecraft projects once they crack the layering method.
Use the free Minecraft Dome Generator to get your layer-by-layer blueprint before your next build. Need to nail the base circle first? The Minecraft Circle Generator has you covered. And for full sphere builds, check out the Minecraft Sphere Generator on the same site.